If you’re the kind of person that likes to maximize every second of your time and are always on the lookout for ways to increase efficient, then this post is right up your alley. We’ve compiled a list of seven shortcuts you can use in Daylite to take your productivity to the next stratosphere.
1. Global Search Hotkey
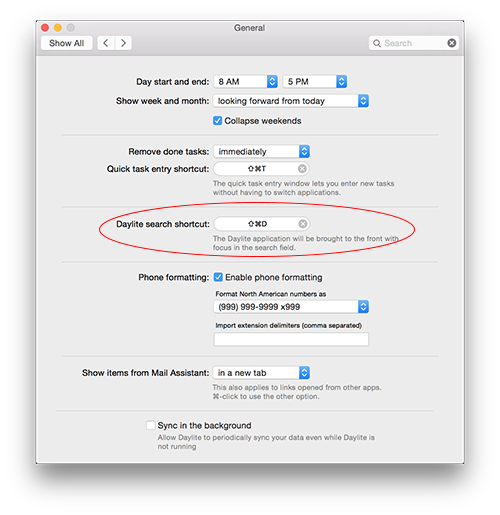
You can set a hotkey for Daylite so that not matter what app or browser you’re in, you can jump to the Daylite Search bar in a snap. This is great for those times when you’re writing an email to a customer and you need to quickly check some details in Daylite first. To set this up, go to your Daylite Preferences, select General, then enter in a shortcut next to “Daylite Search Shortcut”.
2. Quick Task Shortcut
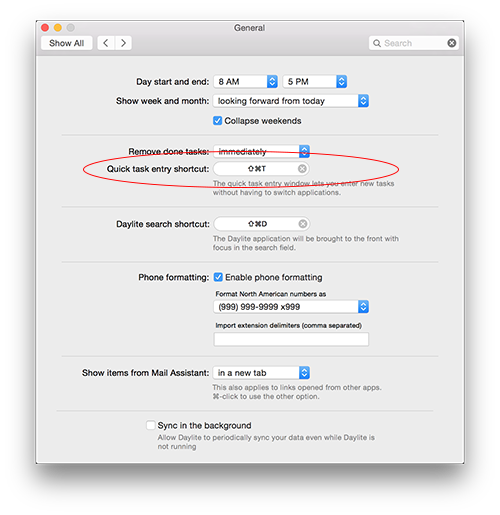
Ever find yourself working in another app or searching for something in Google when you suddenly remember something you need to do? Instead of switching your focus –or apps– you can use the task shortcut to quickly bring up a new task window in whatever app you’re using. You can enter in the task along with the details then save it without ever having to leave the app you’re in. Setting up the keyboard shortcut for quick task entry is done under your General Daylite Preferences. Just enter in a shortcut next to “Quick task entry shortcut”.
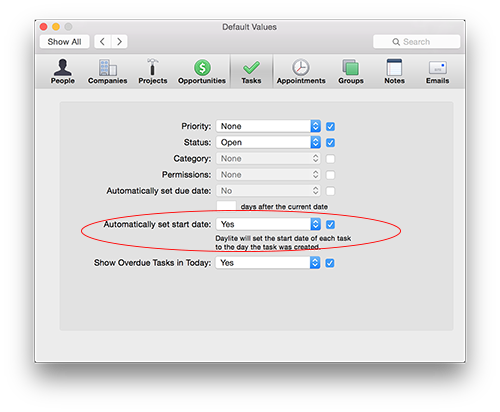
This is a great shortcut to use when you get a phone call and need to quickly jot down a to-do for yourself while you’re on the phone. If you want to keep track of the time of the call, just make sure in you’ve checked off to include the date within the task default settings. To do this, open your Daylite preferences, select Default Values and under the Tasks tab, choose Yes for “Automatically set start date”. This automatically adds the date and time of a task that you create in Daylite.
3. Create & Link Shortcut
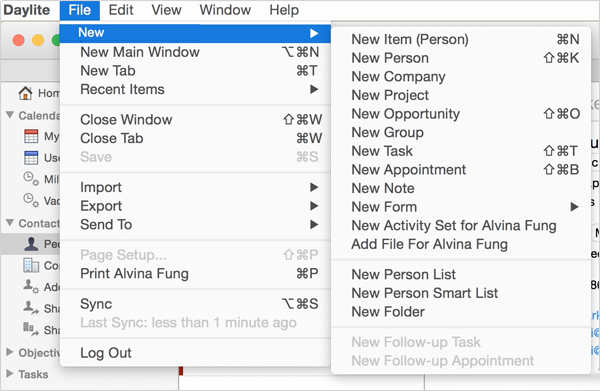
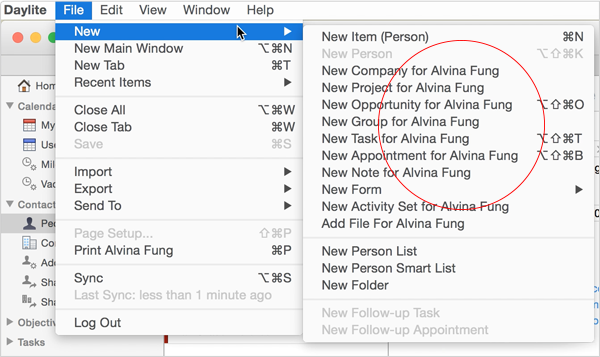
Daylite gives you multiple ways of creating new items and linking items. If you like to create a new item from the Daylite menu by selecting File then New, you can automatically link an item to whatever object is currently selected by holding the option key. For example, let’s say you have a specific person in your contact list that you have open and you want to create a new task for them. If you select that person and select File then New in your Daylite menu while holding down option, you’ll see the options to add new items change to now say “New task for (and the person’s name)”. This means when you create that new item it will automatically be linked to that person.
It even works when selecting a linked item. For example, let’s say you’re currently looking at an Opportunity and you have a linked person. Within the opportunity, you can select the blue pill with that linked person and then go File, New, while holding option to create a new task. It will then link this new task you’ve just created to the person you had selected.
This helps you save time because you can create and link things to other items in Daylite without having to even open that specific item.
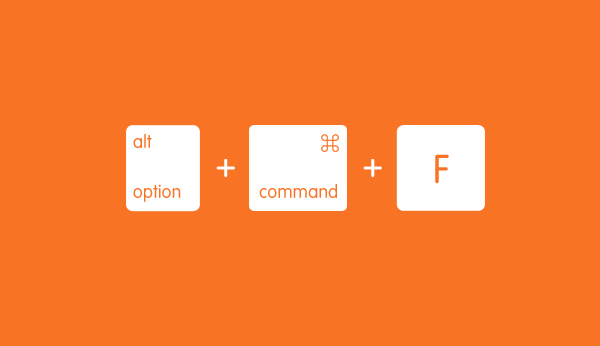
4. Jump to Daylite from Apple Mail
When you’re viewing an email in Apple Mail and you want to jump to a linked item such as a task, appointment, project, etc. in Daylite you can do this by using a handy keyboard shortcut. Just hold down the option key and within the Daylite Mail Assistant window of the email, click the little arrow on the right side of the linked item (the blue pill). This will take you right to that item in Daylite.
![]()
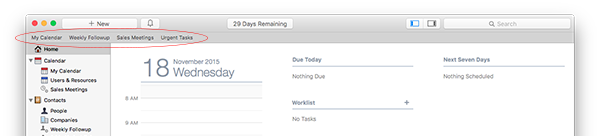
5. Favourites Bar
Do you have specific Calendar views, Smart Lists, or Task lists that you regularly use in Daylite? You can drag these views to the favourites bar at the top of your Daylite window so you can quickly get to these in one click or by using a keyboard shortcut. Just make sure under View in the menu that you have “Show Favourites” selected. Using command plus a number between 1 and 9, you can jump to that view. The number on your keyboard between 1 and 9 corresponds with the order of the view in your favourites bar. You can easily reorder these by dragging and dropping within the favourites bar.
6. Customize Activity Sets & Pipelines with @@ Symbol
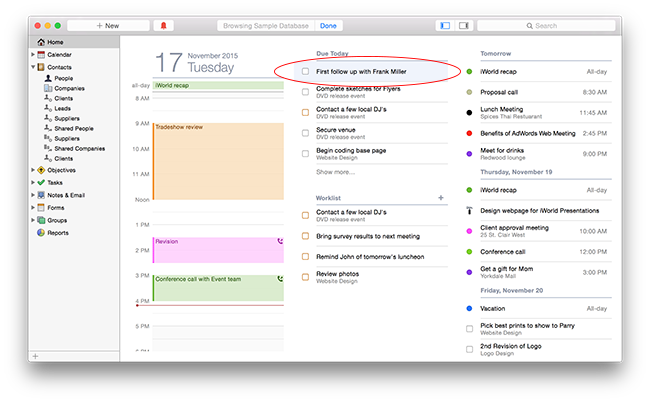
Are you using Activity Sets or Pipelines and want to quickly see who it’s applied to or project it’s for? Well you can see that information right in the task by using the @@ symbol. To do this, choose an Activity Set or Pipeline within your Daylite Preferences. Then update the task name to include @@. The @@ should replace the name of the contact, project, or opportunity that it is applied to. For example, “Follow up call with @@”. Or “Review feedback for stage 2 of @@”.

If it’s an Activity Set, you’ll see the name of the person it’s applied to right in the task name when it pops up on your due list. And if it’s a Pipeline, you’ll see the name of the opportunity or project that the task is for.
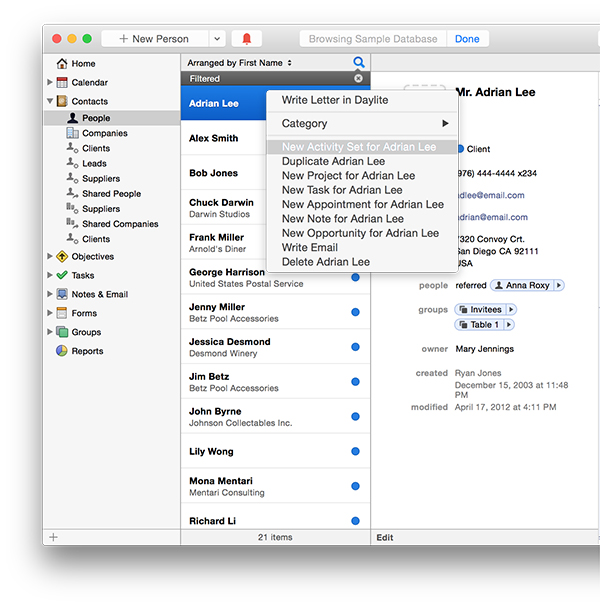
7. Customized Contextual Menu
You can create your own shortcuts by customizing the contextual menu. This helps you save time because the commands you use regularly for each item will be right there when you hit the control key and click. The contextual menu can be customized for each Daylite item. Meaning you can customize what options are available when you right click a person, and you can customize different options for when you right click on a project. Maybe you find yourself often changing the category of a person because you update your leads to customers frequently. Or maybe you regularly need to apply an Activity Set to people, projects, or even groups. Within your Daylite Preferences, select Contextual Menu. From here you can select the most common actions you want to have in your Contextual Menu for each type of Daylite item. Just select an action on the left hand side and drag it over to the right where you can see how it will appear in your contextual menu. You can also drag and drop to reorder things in your menu. By adding a separator between actions in your contextual menu it makes it a bit easier to differentiate between. For example, I have Category separated because that option is to change information, whereas the other actions are to create new items.
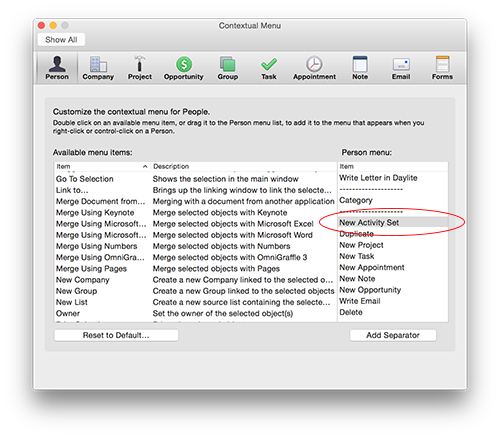
This is how it will look when you’re using it.
These shortcuts and customizations help make your workflow in Daylite even faster. Try working some of these keyboard shortcuts into your workflow today.